 how-to
How to Return Custom Apparel Easily
Table of Contents
- Understanding Custom Apparel Return Eligibility
- Common Custom Apparel Return Policy Rules
- Documenting Defects or Fulfillment Errors
- What to Include in a Return Request
- How to Return Damaged Custom Apparel
- Getting Your Custom Apparel Return Label
- Step-by-Step Return Workflow
- Preventing Return Problems Before You Order
- Refund Tracking and Processing Timelines
- Frequently Asked Questions
Last Updated: October 18, 2026
Understanding Custom Apparel Return Eligibility
The process to return custom apparel isn't always straightforward. Unlike off-the-shelf items, personalized gear presents unique challenges. The key is knowing what qualifies for a return before you order.
Most custom apparel falls into two categories: items with defects or errors, and items that simply don't meet your expectations. The first type is almost always returnable. The second depends heavily on the seller's specific policy.
At YleaCreations, we understand that buying custom apparel online carries real risk. You can't try it on first. You can't see the colors in person. That's why we're transparent about what happens if something goes wrong.
Your return eligibility hinges on three factors: the item's condition, the reason for return, and how quickly you act. Most sellers enforce strict return windows for custom pieces, often shorter than standard apparel returns. This is because personalized items have limited resale value once they're made.
Common Custom Apparel Return Policy Rules
Custom apparel return policies vary widely, but certain patterns emerge across most retailers. Understanding these rules helps you make informed decisions before ordering.
Personalized items and return windows
Most sellers enforce a 14-day return window for custom apparel. This is significantly shorter than the standard 30-day window for regular clothing. The reason is simple: custom items lose value immediately after production.
For personalized gear, items with your name, a custom design, or made-to-order specifications, the return window typically starts from the receipt date. Some sellers count from the order date instead, so clarify this detail before purchasing.
The return window is non-negotiable. Once it closes, you generally cannot return the item, even if it's defective. This is why speed matters. If you notice a problem, contact customer service immediately.
Many retailers offer a 7 business day window for defective items specifically. This shorter timeframe reflects the urgency of documenting production errors before they become harder to prove.
Exceptions for defects and errors
Defective or incorrectly produced items typically fall outside the standard return window. If the printing is smudged, the color is wrong due to a production error, or the item arrived damaged, you usually have grounds for a return or exchange.
The distinction matters. A shirt that fits poorly or doesn't match your vision is a preference issue, typically non-returnable. A shirt with misprinted text or faded colors due to production error is a defect, usually returnable.
Damaged items during shipping also qualify for returns in most cases. If your custom apparel arrived torn, stained, or crushed, photograph the damage and the original packaging immediately. This documentation is your proof.
Some sellers require you to return the defective item before issuing a refund. Others offer exchanges without requiring a return first. Know the policy before you commit to a purchase.
Documenting Defects or Fulfillment Errors
Documentation is your strongest tool when you return custom apparel. Clear evidence of a defect or error dramatically increases your chances of approval.
Start by examining the item in detail the moment it arrives. Check the printing quality, color accuracy, sizing, and material condition. Compare it against the product listing or mockup you approved before ordering.
For printing errors, photograph the defect from multiple angles. Capture close-ups of misprinted text, color mismatches, or alignment problems. Include a photo showing the overall item for context. Lighting matters, use natural daylight to show true colors.
For damage, photograph the item and the original packaging together. Show how it arrived, any tears or stains, and the condition of the box or mailer. If the packaging itself is damaged, photograph that too. Sellers need to see that damage occurred in transit, not after you received it.
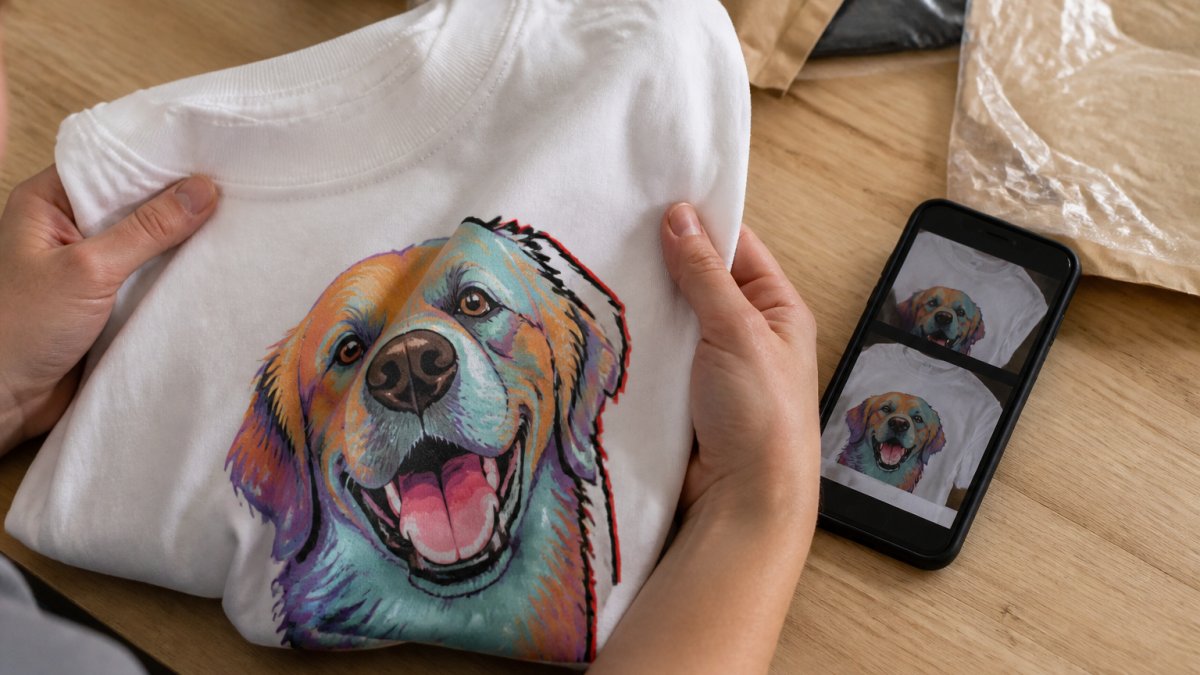
Keep your original order confirmation and any email correspondence about the order. If you received a mockup or proof before production, save that too. These documents prove what you ordered versus what arrived.
For sizing issues caused by production error (not fit preference), measure the garment carefully. Compare your measurements to the size chart provided at purchase. Document any significant deviations.
Write down the specific issues in clear language. Instead of "the shirt looks wrong," describe exactly what's wrong: "The back print is shifted 2 inches to the left" or "The blue color appears faded compared to the mockup I approved."
What to Include in a Return Request
Your return request is your formal case for why the item should be accepted back. Structure it clearly and include all relevant information.
Start with your order number. This is the fastest way for customer service to locate your purchase and verify your eligibility. Include the order date and the date you received the item.
Explain the reason for your return in one clear sentence. Don't over-explain at this stage. Examples: "The item arrived with a production printing error," "The package arrived damaged," or "The item does not match the approved mockup."
Attach your documentation photos. Most sellers prefer 3-5 clear photos showing the issue from different angles. For damaged items, include photos of both the item and the packaging.
Include your contact information: email address and phone number. Provide the shipping address where you'll return the item if approved.
State what you're requesting: a full refund, store credit, or an exchange. Be clear about your preference, though some sellers may only offer one option.
Here's a template you can adapt:
Subject: Return Request for Order [Order Number]
Hello,
I'm requesting a return for order [Order Number], placed on [Order Date] and received on [Receipt Date].
Reason: [Brief description of defect or error]
I've attached photos documenting the issue. [Describe what the photos show.]
I'm requesting [refund/exchange/store credit]. Please let me know what information you need from me to process this return.
Thank you, [Your Name] [Contact Phone]
Keep your tone professional and factual. Avoid emotional language or accusations. Sellers respond better to clear, documented requests than frustrated complaints.
How to Return Damaged Custom Apparel
Damaged custom apparel requires a slightly different approach than defective printing or production errors. The goal is proving the damage occurred during shipping, not after delivery.
Photograph the item in the condition it arrived. Don't wash it, wear it, or attempt repairs. Keep it exactly as it came out of the box. This preserves evidence of shipping damage.
Take photos of the original packaging. Show any tears, crushing, water damage, or other signs that the box was mishandled in transit. If the item was wrapped in tissue or bubble wrap, photograph that too.
Contact the seller's customer service within 24 hours of receiving the damaged item. Speed matters here. The sooner you report damage, the more credible your claim appears.
Provide your photos and a clear description of the damage. Explain how the damage affects the item's wearability or appearance. If the custom apparel is completely unusable, say so.
Ask about the seller's preferred return process for damaged items. Some sellers offer prepaid return labels. Others may authorize a return without requiring the damaged item back, especially if it's severely damaged.
Keep all communications in writing. Email is ideal because it creates a documented record. Avoid phone calls unless absolutely necessary, and follow up with an email summary of what was discussed.
Getting Your Custom Apparel Return Label
Most sellers provide return labels to approved returns. Understanding how this process works prevents confusion and delays.
After your return request is approved, the seller typically emails you a return label. This label is usually a prepaid shipping label that you print and attach to your return package. The label covers the cost of shipping the item back.
If you don't receive a label within 2 business days of approval, follow up. Some sellers' systems can delay label generation. A polite email reminder usually prompts quick action.
Print the label clearly and attach it securely to the outside of your return package. Use clear packing tape so it doesn't peel off during transit. Include your order number on the package itself as well, in case the label gets damaged.
Some sellers provide a Return Merchandise Authorization number (RMA number) along with the label. Write this number on the outside of the package in permanent marker. This helps the seller track and process your return quickly.
If the seller doesn't provide a prepaid label, ask about reimbursement. Some retailers refund return shipping costs if the return qualifies under their policy. Get this commitment in writing before you pay for shipping yourself.
Ship the item promptly after receiving approval. Don't let it sit for weeks. The faster you return it, the faster you'll receive your refund or exchange.
Step-by-Step Return Workflow
Following a clear process increases the likelihood of a smooth return. Here's how to navigate each stage.
Step 1: Contact customer service
Reach out to the seller's customer service team as soon as you identify a problem. Most sellers provide multiple contact options: email, phone, live chat, or a contact form on their website.
Email is usually the best choice for custom apparel returns. It creates a written record of your request and gives the seller time to investigate thoroughly.
Use a clear subject line: "Return Request for Order [Number]" or "Damaged Custom Apparel Return."
Provide your order number, order date, and receipt date in your first message. Include a brief description of the issue. Attach one photo showing the problem clearly.
Keep your tone professional and straightforward. Avoid venting frustration or making demands. Customer service representatives respond better to calm, factual requests.
Step 2: Submit your return request and photos
Once you've made initial contact, the seller may ask for more information. Provide detailed photos showing the issue from multiple angles.
For printing defects, show close-ups of the error and a full-item photo for context. For damage, photograph both the item and the original packaging. For color issues, photograph the item in natural light next to the original product listing if possible.
Write a clear description of each photo. Example: "Photo 1 shows the full shirt. Photo 2 shows the misaligned print on the back. Photo 3 shows the shifted text more closely."
Include your approved mockup or order confirmation if you have it. This helps the seller verify that what arrived doesn't match what you ordered.
Most sellers respond to return requests within 1-2 business days. If you don't hear back within 3 business days, send a follow-up email.
Step 3: Receive your RMA number and return label
Once your return is approved, the seller provides an RMA number and a prepaid return label. The RMA number identifies your specific return in their system.
Write the RMA number on the outside of your return package in permanent marker. This ensures the seller can track your return and match it to your original order.
Print the return label and attach it securely to the package. Use clear packing tape and smooth out any bubbles or wrinkles. The label must be readable for the carrier to process it correctly.
If you don't receive a label within 2 business days of approval, contact the seller again. Occasionally labels get caught in spam filters or delayed in email systems.
Step 4: Ship and track your return
Pack the custom apparel securely. Use a box or padded mailer appropriate to the item's size. Include any original packaging or tags if you have them.
Use the prepaid shipping label provided by the seller. Take the package to a shipping location (post office, UPS store, FedEx location) that matches the label's carrier.
Request a tracking number at the time of shipment. Write this number down and save it. You'll use it to confirm delivery.
Track your return package using the tracking number. Most carriers provide updates as the package moves through the system. This tracking information proves you shipped the item on time.
The return typically arrives at the seller's facility within 3-7 business days, depending on distance and carrier.
Step 5: Refund or exchange processing
Once the seller receives your return, they inspect the item to verify it matches your claim. This inspection typically takes 3-5 business days.
If the return is approved, the seller processes your refund or exchange. Refunds usually appear in your original payment method within 5-10 business days after approval, though this varies by bank.
If you requested an exchange, the seller ships the replacement item. Exchanges often process faster than refunds because the seller doesn't need to wait for your bank to process a transaction.
You'll receive an email confirming the refund or exchange. This email includes the date the refund was issued and an estimated arrival date.
If the seller denies your return, they'll explain why. Common reasons include missing the return window or the item not matching the described defect. You can often appeal a denial by providing additional documentation or requesting a supervisor review.
Preventing Return Problems Before You Order
The best return is one you never need to file. Smart shopping decisions prevent most return situations.
Before ordering custom apparel, examine the product listing carefully. Read the full description, not just the headline. Check the size chart and compare it to your actual measurements.
Review photos of the item from multiple angles. Look at the printing quality, color accuracy, and material texture. If the listing doesn't show enough detail, contact the seller and ask for additional photos before ordering.
Understand the seller's return policy before you buy. Look for the policy link on their website, usually in the footer. Read it completely. Note the return window, what items are returnable, and what condition items must be in.
Check customer reviews if available. Real buyers often mention print quality, color accuracy, sizing, and how the seller handles returns. Pay attention to complaints about these specific issues.
For items with custom designs or personalization, request a mockup or proof before production starts. Most quality sellers provide this. Review the mockup carefully and approve it in writing. This approval becomes your documentation if the final product doesn't match.
Ask about material composition and care instructions. Custom apparel sometimes uses different materials or printing methods than standard clothing. Understanding these details helps you care for the item properly and know what to expect.
If you're ordering from a new seller, start with a small order. Order one item first to evaluate quality, shipping, and customer service. Once you're confident, order larger quantities.
Order early if you need the item by a specific date. Custom apparel takes longer to produce than off-the-shelf items. Shipping delays happen. Build in buffer time.
Refund Tracking and Processing Timelines
Understanding refund timelines prevents unnecessary worry and helps you know when to follow up if something goes wrong.
Once your return is approved, the seller issues a refund. This doesn't mean the money appears in your account immediately. Several steps occur between approval and the funds arriving.
The seller's system processes the refund within 1-2 business days of approval. They generate a refund transaction and submit it to your payment processor (credit card company, PayPal, etc.).
Your payment processor then processes the refund. This typically takes 3-7 business days. Credit card companies can take up to 10 business days in some cases.
The refund appears as a credit on your account. For credit cards, you'll see it as a negative charge (a credit) on your next statement. For bank transfers or digital wallets, the money appears in your account directly.
If you don't see the refund within 10 business days of the seller's approval, contact them. Ask for proof that the refund was processed. They can provide a refund confirmation number or transaction ID.
If the refund still hasn't appeared after 14 business days, contact your payment provider. They can investigate whether the refund was received and help resolve delays.
For exchanges, the timeline is different. The seller ships the replacement item instead of issuing a refund. Exchanges typically ship within 3-5 business days of approval and arrive within 7-14 business days depending on distance.
Track your replacement shipment using the tracking number provided. This confirms the new item is on its way.
If you paid for your original order with store credit or a gift card, refunds may appear as store credit instead of a payment refund. Check the seller's policy to understand how this works.
Returning custom apparel doesn't have to be stressful when you know the process. The key is documenting everything, acting quickly, and communicating clearly with customer service. At YleaCreations, we believe in standing behind our work. Our custom apparel is crafted to bring joy and express your personality. If something doesn't meet your expectations or arrives with a defect, we want to make it right. Shop our collection on Etsy and discover unique, mood-lifting pieces designed for animal lovers, daydreamers, and anyone who values personal expression.
Frequently Asked Questions
Can I return custom apparel if I opened or tried it on?
Most sellers have strict policies on personalized items. If the custom apparel is unworn and in original condition, you may be eligible for an exchange or store credit, but not always a full refund. However, if the item arrived defective, damaged, or with a production error, you can return it regardless of whether it was opened. Always check the specific custom apparel return policy before purchasing, and contact customer service immediately if you spot defects.
What should I include in a return request for custom apparel?
Include your order number, receipt date, clear photos of the defect or error from multiple angles, a detailed description of the issue, and your reason for return. If the printing is incorrect or colors don't match the design, explain specifically what's wrong. Provide your preferred resolution (refund, exchange, or store credit). This information helps customer service process your return faster and ensures you receive the right resolution.
How long does the refund processing take after I ship my custom apparel return?
Refund processing typically takes 5-10 business days after the seller receives your return, though timelines vary by retailer. You can track your return shipment using the tracking number provided with your return label. Once the seller inspects the item and approves your return, the refund is processed to your original payment method. Store credit or exchange items may process faster than refunds.
What's the difference between a defect and a fit or preference issue?
A defect is a manufacturing or production error: printing that's crooked, faded, or incorrect; seams that are torn; colors that don't match the product description; or damage from shipping. A fit or preference issue means the size, style, or design simply isn't what you wanted, even though the item was made correctly. Most sellers won't accept returns for preference issues, but defects are always returnable. Document any defect with photos before contacting customer service.